 |
| 1. First I lay out the lettering on Borden & Riley #37 Boris Layout Bond... |
 |
|
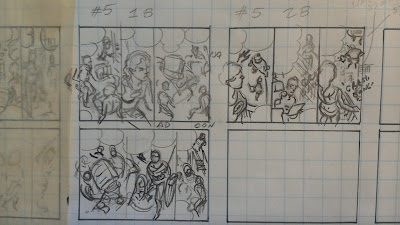
2. After determining where the word balloons will fall, I work out a thumbnail (1 3/4" inch wide). |
 |
| 3. Then I pencil with light blue Col-Erase and graphite pencils on the layout bond (note: I added an additional word balloon) ... |
 |
4a. I proceed to blue-pencil the other panels in the tier. I often use scrap pieces of tracing paper to cover completed panels, to avoid smearing. |
 |
| 4b. A closer shot of the blue pencil rough taking shape. |
 |
| 5. Pencil refinements continue. I usually take 3-4 passes over a figure to arrive at a tight pencil drawing. The tools of the trade are shown here. |
 |
| 7. I thought I was done, but Clarissa's head was angled too low and Stella's expression wasn't working, so I redrew the heads the next morning... |
 |
| 8. Here is the final composite with the fixed heads. I think this will work better. |


Amazing!
ReplyDelete